Your bat is a key waiting to unlock power you haven’t tapped yet. You stand in the box knowing you’ve got more in the tank, but you’re not sure how to find it in just 30 days.
That’s where a focused plan comes in: you’ll measure where you are now, fix your foundation, and build speed through smart training. The clock starts when you do.
Your 30-Day Bat Speed Improvement Roadmap
How do you turn raw potential into real bat speed in just one month? You follow a roadmap that builds from the ground up.
Week 1-2: Build Your Foundation****
You start with kinetic chain sequencing. You learn to fire your hips, then torso, then hands. This creates efficient energy transfer. You don’t rush; you groove the pattern.
Week 3-4: Add Overload Training****
You pick up weighted bats. Heavy bats build strength; light bats train quickness. You alternate both to recruit bigger muscles and faster tempos. You’re teaching your body to move quicker without thinking.
Track Everything
You use objective feedback from sensors like Blast Motion. You pair what you feel with real data. You see bat speed climb in real time.
You train 3-4 times weekly. You blend speed work with swing decisions. At day 30, you reassess and adjust.
Recommended Products

DYNAMIC SPEED TRAINING: Includes two weights for a comprehensive training system, one 12 oz and one 16 oz batting donut; Start light to loosen up, go heavier to build strength, then remove weight to swing with improved power
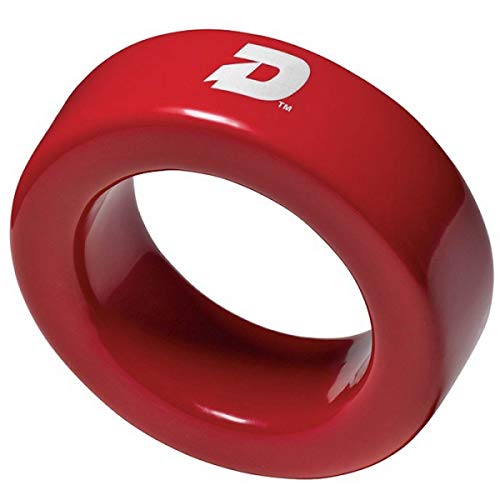
Use for training and building arm strength

WEIGHTED TRAINING BALLS: Set includes a 6 pack of 16 oz training balls measuring 2.8 inches for baseball and softball training
Measure Your Baseline Before You Start
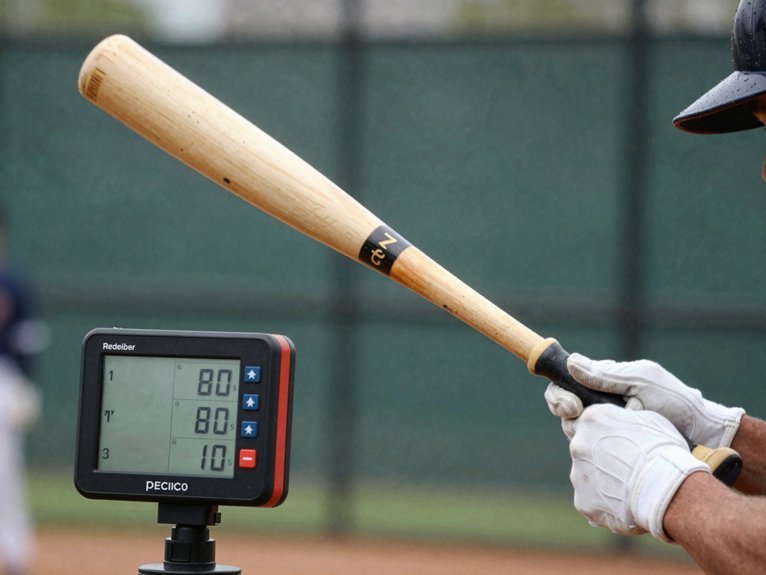
Where do you begin when you want to swing faster? You start with baseline testing, because you can’t improve what you don’t measure.
You can’t improve what you don’t measure—start with baseline testing to know exactly where you stand.
Grab a reliable sensor like Blast Motion and record your bat speed at contact. This number becomes your starting line. Head to a controlled environment, a cage or batting tunnel, so pitch speed and crowd noise don’t throw off your results.
Keep your setup consistent: same bat, same grip, same stance. You’re building a fair comparison, not chasing random numbers. Document additional measurement metrics like smash factor, exit velocity, and swing path. These give context to your bat speed and show where mechanics need work.
Schedule this test early in your 30-day program. Set a realistic goal range, maybe plus 2 to 5 mph. Now you’ve got a target, and you’re ready to chase it.
Recommended Products

[Simple. Reliable. Effective.] The Swing Speed Radar, trusted by athletes for 25 years, delivers accurate swing speed readings at the press of a button. Focus on your swing, not technology. Turn on, swing, see your speed. The Swing Speed Radar keeps it simple, providing all the data you need, instantly and reliably.

Promotes proper grip, hand placement, hip rotation and swing path during and after contact is made. Provides instant feedback, allowing players to make proper adjustments to their hitting technique

BLAST SENSOR BAT ATTACHMENT: The Blast Baseball and Universal Bat Attachment is designed for the Blast GEN3 sensor. This attachment fits most regulation baseball and softball bats and securely attaches your Blast sensor to the bat.
Understand What Bat Speed Measures and Why It Matters
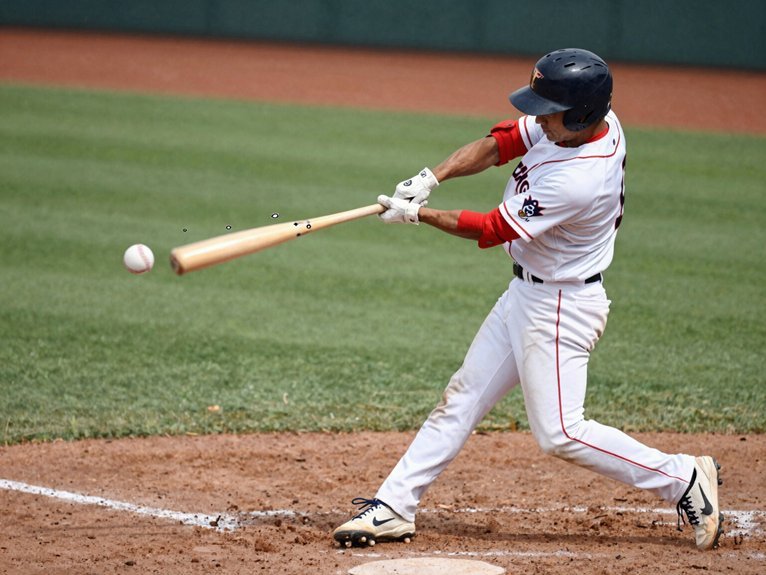
Bat speed isn’t just about swinging your arms as fast as you can, and that’s where many players get confused. You’re measuring how fast the sweet spot moves at contact, not overall swing speed. Tools like Blast Motion sensors and motion capture focus on that exact moment of impact.
This measurement and timing matter because faster bat speed directly boosts exit velocity. You’ll see roughly +1.2 mph exit velocity for every +1 mph bat speed you gain. That means small improvements create bigger hits and longer fly balls.
Higher exit velocity also shrinks defenders’ reaction time, turning routine outs into base hits. Baseline bat speed varies by level: average high school hitters sit around 60–68 mph, while elite college players exceed 70 mph.
Recommended Products


Know Your Target: Optimal Bat Speed at Contact
You need to understand exactly what you’re chasing before you can catch it, so let’s pin down what “contact speed” really means and how you’ll measure your starting point. Contact speed is the velocity of your bat’s sweet spot at the exact moment it meets the ball, not your peak swing speed or hand speed. Tools like Blast Motion sensors or motion capture systems give you that precise number.
Grab a baseline measurement this week, because you can’t improve what you haven’t tracked. Knowing where you stand now sets up everything that follows.
Recommended Products

SWINGRAIL IS A SCIENCE- BACKED PATENTED WAY TO IMPROVE YOUR SWING MECHANICS & BECOME BETTER HITTER!

⚾【STURDY & BUILT TO LAST】This swing trainer features a heavy-duty metal frame, X-shaped base, and 4 ground stakes. The sturdy construction can withstand impact and provides extra durability and stability during intense sessions. Suitable for use on any surface.
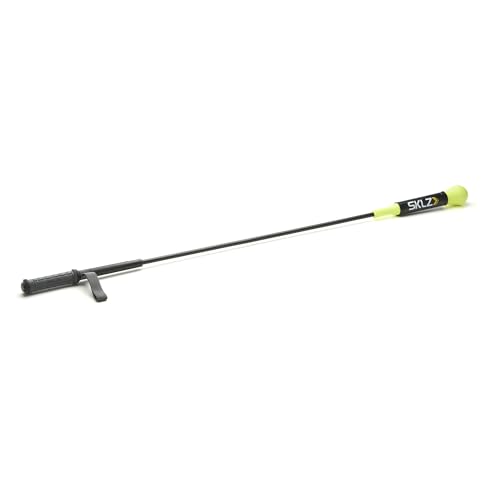
ONE-ON-ONE COACHING TOOL FOR BATTING PRACTICE: Coach, parent, or teammate holds the 52 inch trainer and positions the ball at any height or angle to simulate different pitch locations; helps batters develop consistent ball contact and proper swing mechanics
Define Contact Speed
Why does your swing feel fast but the ball barely leaves the infield? You’re probably confusing overall swing speed with contact speed, the metric that actually matters.
Contact speed measures how fast your bat’s sweet spot travels at the exact moment you meet the ball, not how quick your hands start. Tools like Blast Motion track this precisely, showing accomplished hitters generate higher contact speed that directly boosts exit velocity and distance.
You need kinetic-chain sequencing, your body’s coordinated whip from legs through hips to hands. When your timing clicks, energy transfers efficiently into the barrel. Without this sequencing, you’re leaking power somewhere in your swing.
Understanding contact speed separates feel from real results. You’ll stop chasing empty quickness and start building barrel velocity where it counts, at impact.
Measure Current Speed
Before you can get faster, you’ve got to know where you’re starting from. Grab a bat sensor like Blast Motion and measure your bat speed at contact, that’s the sweet spot speed when you connect with the ball.
Know Your Numbers
Check these measurement benchmarks to see where you stand:
- Elite hitters: 70+ mph
- Average high school players: 60–68 mph
Every 1 mph of bat speed adds roughly 1.2 mph to your exit velocity, which means 5 mph gains could launch the ball 15–20 feet farther. That’s the difference between a warning track out and a home run.
Test Smart
Don’t just chase speed. Track your Smash Factor and pitch speed too, so you’re building real hitting efficiency, not just swinging harder.
Fix Your Foundation: Stance and Posture First
Where does real bat speed actually start? It starts with your stance and posture. You can’t build speed on a shaky foundation, so you need to lock in your lower body first.
Your stance/posture controls everything that follows. When you stabilize your legs and keep your core tight, you create a platform for efficient energy transfer through your swing. Without this base, you’re leaking power before the bat even moves.
Check yourself for these common problems:
- You’re firing your shoulders before your hips clear, killing your hip-to-shoulder separation
- You’re losing rotational torque that top hitters maximize
- You’re rushing to swing harder instead of moving better
Fix this now. Anchor resistance bands at hip height and drill hip drive with closed shoulders at front foot contact. Build the foundation, and the speed will follow.
Recommended Products

REAL FEEL: Experience unmatched realism with our VR baseball bat attachment. Whether you're training in WIN Reality, swinging in Home Run Derby VR, or batting in Totally Baseball, this bat brings real-world feel to your virtual game

Suitable for Players of All Levels

DONUT DRIP: Sprinkle some power on your swing; Train and warm up in style with our donut designs inspired by the latest baseball swag and trending pro players; A fun and functional alternative to our top selling bat weights
Build Hip-to-Shoulder Separation for Explosive Rotation
You need to master kinetic chain sequencing and separation angle development if you want real explosive power at the plate. Elite hitters create 40 to 50 degrees of hip-to-shoulder separation at front foot landing, while most amateurs only manage half that. You’re leaving serious bat speed on the table without deliberate training.
Start anchoring a resistance band at hip height and rotate fully while keeping your shoulders closed. Three sets of ten reps daily will pattern this movement until it becomes automatic.
Recommended Products

INCREASE BAT SPEED. Enhance your game with our scientifically backed Bat Speed Trainers. Utilizing overload/underload methodology and varied weights, these trainers improve bat speed, barrel control, and power by pushing muscular thresholds for a faster, more impactful swing.

A BRAND YOU CAN TRUST: Haynes is an instantly recognisable classic British brand which have now put their name to a range of electronic model building kits. Each kit comprises all the components needed to create your own version of classic electronic devices and comes with a clear and concise instruction guide in the style of a Haynes manual.

Log in faster and more securely - Designed specifically for Windows 11, 10 with Hello features. *Not compatible with Windows 7, 8, MAC, Linux or any other OS.
Kinetic Chain Sequencing
Why do some hitters generate effortless power while others swing hard but produce weak contact? You’ve probably seen it: one batter looks smooth and launches rockets, while another grinds and pops up weakly. The secret lies in your kinetic chain sequencing, the coordinated firing of body segments from the ground up.
When you master this sequence, your hip rotation fires first, then your torso follows, creating explosive hip-to-shoulder separation. Elite hitters achieve 40–50 degrees of this separation, while amateurs often manage only 20–25 degrees, leaving power on the table.
To build this automatic pattern, you’ll need deliberate daily training:
- Anchor resistance bands at hip height and rotate fully while keeping shoulders closed
- Pause at front foot landing to feel your hips lead and shoulders lag
- Use slow-motion swings to engrain the sequence before adding speed
Get your sequencing right, and you’ll convert rotational energy into serious bat speed.
Separation Angle Development
Standing in the batter’s box, you’ll feel the difference immediately when your hips fire open while your shoulders stay locked back. That’s hip-to-shoulder separation, and it’s your secret weapon for explosive bat speed.
Elite hitters create 40–50 degrees of separation at front foot landing, while amateurs often manage just 20–25. That gap matters. More separation means more rotational torque, and more torque means faster swings.
Build It Daily
Grab a resistance band anchored at hip height. Rotate your hips fully while keeping your shoulders closed. Complete 3 sets of 10 reps. This trains your lower half to fire first, automatically.
Don’t let your shoulders jump early. When your hips lead and your torso follows, you’ll maximize separation and crush pitches with authority.
Why Your Hands Might Be Slowing You Down
Where exactly does your bat speed disappear when you’re putting in the work? Often, it’s hiding right in your hands.
When your hands fire too early, they disconnect from your lower body, and you lose precious hip-to-shoulder separation. That’s where real power lives. Your strong arms can’t save you if your hand timing is off. You’re leaking speed everywhere.
Check your on-plane efficiency. If it sits below 80%, your swing path is too steep or too wide, and you’re sapping bat speed during rotation. You’re cutting through air instead of ball.
Here’s what’s stealing your speed:
- Casting your hands widens the arc and kills contact speed
- Arm-driven swings let your upper body overtake your rotation
- Poor hand timing destroys the separation you’ve built
Tighten your front elbow, keep those hands inside, and let your hips lead. Your bat speed will thank you.
Eliminate Casting and Create a Direct Swing Path
Your hands might be the culprit, but casting is the real swing killer that keeps your bat speed stuck in neutral. When you cast your hands outward, you’re basically sending your barrel on a scenic route instead of a shortcut. That wide swing arc kills your bat speed before the ball even arrives.
Fix Your Path
Keep that lead elbow down and tucked in tight. Let the barrel trail behind your hands longer, and you’ll create a shorter, more direct swing path to contact. Think laser beam, not lasso.
Track Your Progress
Grab a swing sensor and check your on-plane efficiency. If you’re sitting below 70%, push it above 80%. That jump alone adds serious bat speed gains.
Daily Drill
Hook a resistance band at hip height. Rotate your hips fully while keeping your shoulders closed. Repeat this daily for automatic casting elimination and faster bat speed.
Recommended Products

[Tempo is Everything] - Train Your Body to Swing Like a Pro. The Tempo Timer helps you practice and maintain tempo to your swing from start to finish. Tempo improves consistency in your swing when training for more speed. More speed equals more distance in your drives.


IMPROVE SWING MECHANICS – Whether you're a seasoned player or just starting, the Hurricane Category 4's durable swing arm hitting stick helps you refine your hitting technique, whether static tee practice or moving pitch simulation.
Master Ground Force and Weight Transfer
Ground force isn’t just fancy coach talk; it’s the engine that powers your swing. You load your lower half first, letting your hips drive rotation while maintaining hip-to-shoulder separation of 40–50 degrees. This separation stores elastic energy that explodes into bat speed.
Ground force is the engine that powers your swing—load your lower half first, let your hips drive rotation, and store elastic energy for explosive bat speed.
Your weight transfer stays controlled when you keep your stride loaded and brace your front leg at contact. Don’t let your weight leak forward too early, or you’ll kill your rotational torque.
Build this sequence from the ground up daily:
- Load your back hip and drive it first, letting shoulders follow
- Brace your front side to stabilize your weight transfer
- Anchor a resistance band at hip height, rotating hips fully while keeping shoulders closed, 3 sets of 10 reps
Repeat these cues until the separation feels automatic.
Recommended Products
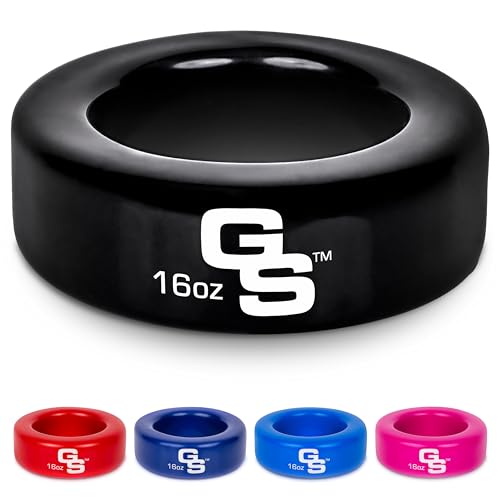
ESSENTIAL & AFFORDABLE: Ideal for coaches and players who only need one bat donut for daily drills, no need to spend extra on a set of two; Includes one standard size 16 oz bat weight that easily fits in any backpack or gear bag; Available in 5 colors

ULTRA LIGHTWEIGHT: This lightweight design allows for more swings and less fatigue

NEWLY UPGRADED DESIGN: Jikbeed Baseball Bat has optimized the mesh and handle based on product features, and added a storage bag
Build Lower-Body Power With Trap Bar Deadlifts
You’ll build serious lower-body power by mastering trap bar fundamentals, which let you pull heavy weight while keeping your back safe and your hips explosive.
Focus on crisp hip hinges and driving through your legs for 4-5 sets of 5-10 reps, resting enough to stay explosive each set.
Once you’ve nailed the basics, smart deadlift programming tips will help you progress toward sport-specific work that directly transfers to faster swings.
Recommended Products

TAKE YOUR BAT SPEED TRAINING TO THE NEXT LEVEL - Overspeed Training is the future of Overload/Underload Training in baseball. We’ve optimized the weight of our training...
Trap Bar Fundamentals
Why start with the trap bar deadlift when you’re chasing bat speed? You’re building the engine that drives every swing. This lift connects your legs to your hips to your torso, creating a chain reaction of power.
Here’s what makes it your secret weapon:
You grip neutrally, saving your shoulders while you pull heavy. Your spine stays happier than in conventional deadlifts. You train force production that directly transfers to the box.
Load 4-5 sets of 5-10 reps with challenging weight. Focus on driving through your heels and exploding upward. You’re not just lifting; you’re teaching your body to generate explosive lower-body strength.
Every rep builds the foundation for harder hits. Master this movement, and you’ve got the base for all your softball-specific power work.
Deadlift Programming Tips
A solid trap bar deadlift program doesn’t happen by accident. You need structure, starting with 4–5 sets of 5–10 reps using heavy weight and crisp form.
Master the Hip Hinge First
Your hip hinge drives everything. Push your hips back, keep your chest up, and explode through your heels. This pattern builds the leg drive that transfers directly to bat speed.
Why Trap Bar Wins
The trap bar deadlift keeps your spine happier than conventional pulls while still packing on lower-body power. You get safer loading without sacrificing strength gains.
Timing Matters
Place trap bar work early in your 30-day plan. Build this foundation before adding softball-specific accessories. Your rotational power depends on it.
Strong hips hit bombs. Start pulling heavy, hinge correctly, and watch your swing change.
Add Rotational Strength With Landmine Presses
Rotational power doesn’t just come from your arms, it starts in your hips and travels up through your core.
Press the weight through a controlled arc that builds shoulder strength for the long season ahead. Brace your core and resist early shoulder flare to keep power flowing from hip to shoulder. Complete 3–4 sets of 5–8 reps per side, making this your go-to for upper body work.
You’ll develop safe, sustainable throwing strength while learning the sequencing that directly supports bat speed. The landmine press trains rotational strength without beating up your joints, so you stay strong through warm-ups and doubleheaders alike. Pair it with solid mechanics, watch your timing improve, and feel the difference when you step into the box.
Train Rotational Core Power With Medicine Ball Rainbow Slams
Once you feel your hips firing on landmine presses, it’s time to wake up your core with something explosive.
Why Rainbow Slams Build Rotational Power
Rainbow Slams train rotational core power by loading your torso through side-to-side trunk rotation. You’ll feel the front side pull hard during each slam, teaching your body to separate hips from shoulders. This hip-to-shoulder separation directly transfers to bat speed when you’re in the box.
How to Perform Them
Grab a light medicine ball. Perform 3 sets of 5 reps per side, keeping your tempo controlled and your hips fully engaged. Don’t go heavy; you’re chasing power, not a workout trophy.
The Payoff
Medicine ball training bridges the gap between the gym and the plate. You’ll generate more barrel speed at impact because your core learns to fire explosively. Start Rainbow Slams early in your rotational power work for maximum carryover to your swing.
Load Your Swing Mechanics With Med Ball Shotput Throws
You’ll build rotational power and load your swing mechanics by training both sides of your body with med ball shotput throws, transferring that explosive energy straight into your bat path. Start with 2 to 4 sets of 3 to 5 reps per side using a lighter ball so you nail the technique before cranking up the intensity.
This drill reinforces hip pivot and front-side drive, pairing rotational loading with the timing you need to square up the ball.
Rotational Power Development
Why let your swing power go to waste when you can train your body to fire like a coiled spring? Med ball shotput throws build rotational power by teaching your body to transfer energy from the ground up.
You’ll develop hips-to-shoulders sequencing that mirrors your swing’s kinetic chain. This drill trains both sides to prevent imbalances and ingrains the forward-to-backward drive pattern that creates torque.
Start with 2 to 4 sets of 3 to 5 reps per side using a lighter ball for control. Focus on front-side pull and hip engagement to maintain posture. Progress gradually after building foundational strength.
These explosive throws sharpen timing and force transfer from your legs through your torso to your hands. With consistent practice, you’ll feel the connection that drives barrel speed without losing your mechanics.
Swing Mechanics Loading
Rotational power means nothing if you can’t channel it into your actual swing. That’s where loading your mechanics becomes essential.
Med ball Shotput to Wall drills bridge the gap between raw strength and actual bat speed. You’ll mimic your barrel path at contact while firing your hips, shoulders, and hands in sequence. Start with lighter balls and complete 2-4 sets of 3-5 reps per side. Focus on controlled rotation without losing your balance.
This movement trains you to load and unload your front side, transferring rotational power directly into your swing pattern. You’re building muscle memory that shows up in the box.
Pair Shotput throws with Rainbow Slams to balance power and stability. You’ll develop complete rotational power that actually translates to faster swings, not just gym numbers.
Advance to Band and Cable Rotational Rows
Once you’ve built a solid base of strength, it’s time to add some rotation to the mix.
Band/cable rotational rows bridge foundational work to sport-specific rotational power, helping you develop the bat speed you need at the plate.
You’ll squeeze your shoulder blade down and back while rotating your torso, keeping your core tight and legs engaged.
This creates stability below while your upper body explodes through the movement.
Focus on hip-to-shoulder sequencing, and don’t rush.
Controlled bracing beats sloppy speed every time.
Anchor the band or cable at mid-torso height for proper resistance.
Complete 3–4 sets of 5–8 reps per side to build gradual strength.
Emphasize the stretch-shortening feel that mirrors your swing load.
Master this progression, and you’re building real rotational power that transfers directly to the batter’s box.
Build Fast-Twitch Power With Overload Bats
Grab an overload bat and you’ll immediately feel the difference. You’re recruiting larger muscle groups with every swing, building the fast-twitch power that translates directly to bat speed.
How Overload Bats Work
These heavier bats create resistance that forces your kinetic chain to engage fully. You’ll develop faster muscle firing and amplified force production without overthinking mechanics.
Training Protocol
Use overload bats 3–4 days per week during off-season work. A typical progression starts heavy, then returns you to your game bat so gains stick. Many athletes see 4–8 mph improvements in bat speed with consistent training.
Safety First
Scale weight to your age and experience. Poor form defeats the purpose, so stop before technique breaks down. You’re building power, not ego.
Train Overspeed With Underload Bats
You’ll swing lighter bats to trick your nervous system into moving faster than game speed, which fires up bigger muscles without wrecking your form.
Picking the right underload bat means finding one that’s 10–20% lighter than your gamer, not so light that you lose control.
Structure your sessions by pairing these speedy reps with your overload work, keeping sets short and your intent maxed out on every swing.
Mechanics of Overspeed
Because your muscles need to learn what “fast” actually feels like, overspeed training with underload bats gives your swing a serious upgrade without changing your mechanics. You’re essentially tricking your body into recruiting fast-twitch fibers by swinging lighter sticks at game intensity.
Here’s how you make it work:
- Swing with maximum intent on every rep, treating each underload bat like it’s your gamer
- Focus on hip-to-shoulder separation and staying on-plane through the zone
- Progress gradually, 3–4 sessions weekly, watching for form breakdown
The magic happens when you transfer that quicker tempo back to your standard bat. Your nervous system remembers the speed, and suddenly your regular swing feels lighter and faster. Keep your sequencing clean, and you’ll build bat speed that actually shows up in games.
Underload Bat Selection
Why settle for guessing when picking the right underload bat can make or break your overspeed gains? You’re chasing bat speed development, so grab underload bats that are 10–20% lighter than your game bat. This sweet spot tricks your nervous system into firing faster without wrecking your mechanics.
Look for balanced weight distribution and durable alloy or composite construction. You’ll want something that feels quick but still lets you maintain your natural swing path. Don’t go too light, or you’ll develop bad habits that won’t transfer to game day.
Pair your underload bats with a smart training protocol: high intent, short reps, and plenty of rest between sets. Your goal isn’t exhaustion; it’s teaching your body to move explosively. Choose wisely, swing fast, and watch your bat speed climb.
Training Protocol Structure
How do you actually turn those underload bats into real bat speed gains? You build an overspeed/underspeed protocol that alternates light and heavy bats to train your nervous system for explosive speed.
Here’s your game plan:
- Alternate underload and overload sessions to groove faster sequencing without breaking your mechanics
- Train with full intent to move the bat faster, using instant sensor feedback to lock in improvements
- Maintain training frequency consistency: 3–4 days weekly during your 30-day push, then scale back in-season
Most hitters see 4–8 mph jumps from dedicated bat speed training, with advanced athletes pushing even higher. Your off-season window gives you 6–12 weeks to cement these patterns, so don’t skip sessions.
Treat this like strength training for your swing: progressive, purposeful, and consistent. The bat speed shows up when you commit to the process.
Structure Your Weekly Bat Speed Sessions
Once you’ve committed to improving your bat speed, the real work starts with how you organize your time. Build your weekly structure around 3–4 focused sessions using overload/underload principles to challenge your swing in different ways.
Commit to bat speed improvement by organizing your time around 3–4 weekly sessions using overload and underload principles.
Each session follows a clear progression: start with light swings to wake up your muscles, then grab an underload bat for overspeed work. Move into your main sets with heavier overload bats to build strength, and finish with a cooldown that locks in proper mechanics. You’re not just swinging harder; you’re training smarter.
Track your progress with sensors like Blast Motion to see real bat speed numbers at contact. Aim small, maybe 1–2 mph gains per week, and stay patient.
Pair this speed work with separate practice for swing decisions so your newfound quickness actually produces hits, not just empty velocity.
Your Complete 30-Day Bat Speed Training Schedule
You’ll build your bat speed systematically across three distinct phases. Week 1 locks in your foundations with hip-to-shoulder sequencing and basic overload/underload work, setting you up for Week 2‘s progression into faster, more dynamic movements.
Week 1 Foundations
Why sprint before you can sprint well? Week 1 Foundations builds your base for bat speed by locking in proper mechanics first. You’ll focus on hip-to-shoulder separation, aiming for 40–50 degrees of stretch to create real rotational power. This isn’t about swinging hard yet; it’s about learning to move right.
Your schedule runs 3–4 sessions weekly, blending light trap bar deadlifts with early bat-speed drills. These drills teach your body what efficient sequencing actually feels like.
You’ll work through different load states too: barrel load, handle load, under load, and your game bat. Each session hits 1–2 sets of 8 reps, keeping volume manageable while your motor patterns develop.
- Master hip-to-shoulder separation before adding intensity
- Pair foundational strength work with feel-based bat-speed drills
- Use sensors to connect subjective effort to real bat speed data
Week 2 Progression
How far can you push bat speed in just one week? You’ll find out by doubling down on overload/underload drills while keeping your intent razor-sharp.
Your Week 2 Schedule
Run 3–4 bat speed sessions using Barrels Load, Handle Load, Under Load, and your Game Bat. Stick with 3×8 to 1×8 sets per drill block. Focus on quality reps and consistent speed across every bat type.
Don’t just guess you’re getting faster. Check your Blast Motion sensor at week’s end to see real gains. This data tells you exactly how to adjust next week’s intensity.
Mix in swing decision and mechanics days too. Raw bat speed means nothing if you can’t barrel it up when it counts.
Week 3 Intensity
Week 2 built your foundation, and now it’s time to crank up the dial without losing what you’ve gained. You’ll push harder this week by adding load or volume while keeping your mechanics sharp.
Aim for 4–6 total workouts: 2–3 bat speed sessions plus 1–2 conditioning days. Your overload drills matter here, so grab that heavier bat for 3–4 sets of 5–8 reps, then switch to a lighter bat for 2–3 sets of 3–5 reps. Keep your hip-to-shoulder separation tight and your front leg braced through contact.
Track bat-speed metrics mid-week with blast sensors to confirm gains stick. Maintain short, direct swing paths on every rep. Stop immediately if form breaks; quality beats quantity every time.
Check your data, adjust if needed, and finish strong.
Prioritize Intent Over Perfect Contact
Where’s your bat speed really coming from? It starts with intent, not perfect contact. You’re training your body to move faster, not prettier.
Swing with Purpose
During drills, you’ll swing to accelerate, not to connect cleanly every time. Miss a few, it’s fine. You’re building bat speed through intent, teaching your muscles to fire harder and faster.
Use overload training with heavier bats, then switch to lighter ones. Your nervous system adapts, and speed jumps.
Track What Matters
Sensors measure your progress. You’ll see real numbers, not guesswork. Short, max-effort swings with quick wrists and hip-shoulder separation drive results.
Compare how swings feel to the data, adjust, and repeat.
Stay the Course
Your 30-day plan builds intensity progressively. Retest bat speed weekly. Trust the process, prioritize speed, and watch your numbers climb.
Close the Gap Between Feel and Real
Why does your hardest swing feel slow sometimes? Your perception of effort doesn’t always match your actual bat speed. That’s where you close the gap between feel and real.
You need objective tools to build a reliable feedback loop. Launch monitors reveal what your body can’t sense, showing you exactly how bat speed data changes with each adjustment. You’ll stop guessing and start knowing what works.
Use launch monitors to capture real bat speed numbers, not just gut feelings. Build a feedback loop by comparing your perceived effort against actual data after every swing. Share bat speed data with coaches or teammates who can spot what you miss.
When you align how a swing feels with what the numbers show, your training becomes precise. You’ll trust your mechanics and develop game-ready speed faster.
Use Blast Motion Sensors for Objective Feedback
You’ll want to strap on a Blast Motion sensor if you’re serious about turning guesswork into hard numbers. It gives you instant speed data at contact, tracks your progress over weeks, and helps you optimize swing mechanics with real feedback instead of just gut feelings.
Pair this with your launch monitor readings, and you’ve got a complete picture of whether you’re actually getting faster or just swinging harder.
Instant Speed Data
How do you know if your swing is actually getting faster, or if it just feels faster? You grab a Blast Motion sensor and let the numbers tell the truth. This little device captures your bat speed data at contact, giving you instant speed readings you can trust.
Here’s what makes this feedback so powerful:
- You see your actual velocity, not just what your muscles remember
- You spot real changes between swings, not wishful thinking
- You adjust your mechanics on the spot when numbers drop
Blast Motion bridges the gap between “that felt fast” and “that was fast.” You’ll set specific targets, re-test regularly, and watch your progress unfold in real digits. No more guessing games, just clear proof that your 30-day plan is working.
Track Progress Metrics
Where do you stand after two weeks of hard work? You’ll know exactly when you use Blast Motion sensors to track progress metrics with hard data, not guesswork.
These sensors measure your bat speed at contact and store every swing. You can watch your numbers climb in real time. Track bat speed, exit velocity, smash factor, and swing decisions to see the full picture of your improvement.
Re-test after each training block to quantify your gains. Compare results against your baseline to set season targets and spot your rate of improvement. When bat speed jumps, check if launch angle and hit distance followed. This feedback loop helps you adjust drills and loads on the fly.
Stop wondering if you’re improving. Start knowing.
Optimize Swing Mechanics
Why guess about your swing when sensors can tell you exactly what’s happening? Grab a Blast Motion sensor and strap it to your bat knob. You’ll measure bat speed at contact and track real changes over time, so feel finally meets facts.
To boost your numbers, focus on proper hip-to-shoulder separation and fast wrists. Efficient sequencing directly drives bat speed. Check your Blast data regularly; it shows swing tempo and attack angle too. You’ll spot mismatches between what feels fast and what actually moves the bat.
Compare your feel-based sensations with Blast data to find gaps between perceived and actual speed. Use key metrics to guide which drills you choose and how you progress. Re-test after each training block to verify your bat speed improvements.
Track Bat Speed, Exit Velocity, and Distance
When you’re working to improve your bat speed, you can’t just swing harder and hope for the best. You need data-driven testing to know what’s actually working.
Measure What Matters
Grab a Blast Motion sensor or use motion capture to track bat speed at contact. This shows you precisely where your barrel’s moving fastest. You’ll see exit velocity climb too, since every 1 mph of bat speed adds roughly 1.2 mph to your exit velocity and about 7 feet of distance. That’s a solid return on investment.
Build Your Testing Routine
Run cage-based tests weekly to monitor changes. Separate your focus cycles: work bat speed in one block, smash factor in another, and swing decisions in a third. This keeps your training organized and your improvements real.
Why 90% Bat Speed Beats 100% for Hard Contact
You might think swinging at 100% effort gives you the best results, but your hardest contact often comes when you dial it back to 90%.
At full throttle, your mechanics break down, timing suffers, and you lose the hip-to-shoulder separation that actually creates power.
Finding that sweet spot takes honest feedback from tools like Blast Motion, so you can trust what feels fast actually produces hard, consistent contact.
Optimal Swing Effort
How exactly do you hit the ball harder without swinging your hardest? You dial in your optimal swing effort at roughly 90% of your max bat speed. Elite hitters know that pure max effort often kills timing and mechanics. You’re not trying to swing slow, you’re chasing controlled violence.
You preserve your swing sequence and decision-making when you stay at 90%, keeping your barrel in the zone longer. You train with sensors like Blast Motion to match what feels like 90% with actual exit velocity gains. You maximize smash factor and distance without sacrificing consistency barrel after barrel.
Data shows this approach beats all-out swings for hard contact. You’re building sustainable power, not one lucky rocket. Trust the process, stay efficient, and watch your exit velocity climb.
Contact Quality Trade-offs
Why does dialing back your effort actually produce harder contact? When you swing at 100% bat speed, your mechanics often break down. You rush your sequencing, lose your posture, and mishit the ball. At 90% bat speed, you maintain efficient movement patterns and barrel control, which boosts contact quality and smash factor.
Elite hitters prove this daily. They feel slow but post excellent numbers because controlled acceleration beats wild effort. Don’t trust your feelings alone. Use data-driven drills with Blast Motion sensors to find your optimal effort level. Track what actually produces hard contact, not what feels powerful.
Build feedback loops into your training. You’ll discover that sustainable speed, not maximum speed, drives results. Swing smarter, not harder.
Power Output Balance
The sweet spot for power isn’t where you’d expect. You might think swinging at 100% bat speed gives you the best results, but you’re actually leaving damage on the table.
Power output balance teaches you to dial back to about 90% effort. At this level, you keep your mechanics clean and your decision-making sharp. You don’t sacrifice exit velocity, you optimize it.
Here’s what this looks like in practice:
- You maintain hip-to-shoulder separation instead of muscling the ball
- You preserve barrel accuracy so more swings find the sweet spot
- You build game-ready consistency that translates when it counts
Stop chasing max speed in the cage. Focus on quality sequencing and controlled aggression. Your exit velocity will climb, and you’ll make harder contact more often. That’s the real power move.
Stop Rushing Your Hands: 5 Bat Speed Mistakes
When you’re chasing bat speed, your hands often race ahead of everything else, and that’s where trouble starts. Rushing widens your swing arc and kills speed at contact, so keep your lead elbow down and in, letting the barrel trail your hands longer for a short, direct path.
Your on-plane efficiency should sit above 80%. Anything below 70% signals casting and lost speed that demands immediate swing path corrections. Don’t let your weight shift forward too early; that stalls your rotation and leaves your arms doing all the work. Stay loaded through your stride and brace hard on that front leg at contact.
Early shoulder firing before your hips clear wrecks hip-to-shoulder sequencing and drains your power. Build deliberate sequencing with focused drills. Trust data, not feel; measurements around 68 mph tell you exactly where to fix things.
Translate Practice Speed to Game At-Bats
Here’s your practice bat speed sitting pretty at 75 mph, but game day rolls around and suddenly you’re topping out at 68. That gap kills your exit velocity and wastes all that hard work. You need to close the practice-to-game transfer gap fast.
Use Blast Motion sensors to track your bat speed during live at-bats, not just cage work. Run overload/underload drills with game-speed intent, keeping your mechanics clean under pressure. Simulate real pitch sequences, tracking both bat speed and smash factor so you don’t sacrifice contact quality.
Retest your numbers weekly and adjust based on actual game results. When your practice bat speed matches your game bat speed, you’ll start seeing those hard-hit balls find gaps instead of gloves.
Adjust Your Training as Season Approaches
Why keep grinding the same drills when opening day is creeping closer? You need smart training adjustments that balance bat speed with real game readiness.
Reassess your baseline numbers first. Check your bat speed and exit velocity using blast sensors or similar tools. Then tweak your drills to chase small, realistic gains, like adding 1 to 2 mph.
Shift your focus as games near. Build hip-to-shoulder separation and core stability into warm-ups to keep your speed sharp without losing control. Trade some heavy overload work for technique sessions that prioritize practice speed over max effort.
Test yourself every 2 to 3 weeks. Track your data trends, then refine your plan. This keeps your bat speed climbing without burning out before the first pitch.
Realistic Bat Speed Gains in 30 Days
You’ve adjusted your training for the season ahead, and now you’re wondering what kind of progress you can actually expect in just one month. Let’s set realistic expectations. Most players see bat speed gains of 1–4 mph in 30 days with consistent effort and sound training mechanics. Your starting point matters; beginners improve faster than elite players with less room to grow.
Realistic expectations: 1–4 mph bat speed gains in 30 days with consistent, mechanically sound training.
Your 30-day plan should blend overload/underload drills, rotational strength work, and technical adjustments. Focus on proper sequencing and hip-to-shoulder separation. Track your numbers with tools like Blast Motion to confirm you’re moving the needle.
Key priorities for your training mechanics:
- Build hip-to-shoulder separation for elastic power
- Stabilize your lower half during the swing
- Verify gains with objective tracking tools
Maintain Your Gains After the Program Ends
Where do you go once you’ve put in the work and your bat speed is climbing? You lock in your bat speed maintenance plan so those gains don’t vanish.
Keep testing your numbers weekly with Blast Motion sensors. You’re tracking speed at impact, not just swing effort. Remember, every 1 mph you keep adds roughly 1.2 mph exit velocity and about 7 feet of distance. That 5 mph gain you earned, it means 15–20 extra feet if you maintain it.
Protect your kinetic chain with simple habits: fire your hips before your shoulders, keep that separation sharp, and train ground-up sequencing twice weekly. Don’t let your baseline slip. Typical high school hitters sit at 60–68 mph; elite college hitters push past 70 mph.
Stay consistent, stay explosive, and you’ll keep crushing.
When Bat Speed Matters More Than Contact or Decisions
Sometimes you’ve gotta swing for the fences, not just put the ball in play. There are moments when raw bat speed trumps everything else, and recognizing them helps you choose the right approach.
- Late-game situations: When you need extra-base hits to erase a deficit, prioritize bat speed and exit velocity over playing it safe.
- Facing elite velocity: Against pitchers throwing 95+, you won’t have time for perfect decisions, so your bat speed must carry you.
- Maximizing launch angle: With proper hip-to-shoulder separation, you create the rotational whip that turns contact into home runs.
You measure your bat speed at contact using sensors like Blast Motion, and every 1 mph you gain adds roughly 1.2 mph to your exit velocity and about 7 feet of distance. That compounds fast.
When the game demands damage, trust your training and let it rip.
Build Your Complete Year-Round Hitting Development Plan
Raw bat speed wins those clutch moments, but it doesn’t appear overnight. You need a year-round plan that builds it steadily.
Your Offseason Foundation
Start by mastering your kinetic chain. You load from the ground up, creating hip-to-shoulder separation that whips the barrel through the zone. Use Blast Motion sensors to track your bat speed at impact. You’re aiming for measurable gains, not guesswork.
In-Season Maintenance
Don’t let your exit velocity drop when games pile up. One mph of bat speed equals roughly 1.2 mph exit velocity and about seven extra feet of distance. That’s the difference between warning track and gone.
Track, Adjust, Repeat
Log your data weekly. Balance hard intent with clean mechanics. Your kinetic chain stays connected, your bat speed climbs, and your exit velocity follows. Stay patient, stay consistent, and trust the process.